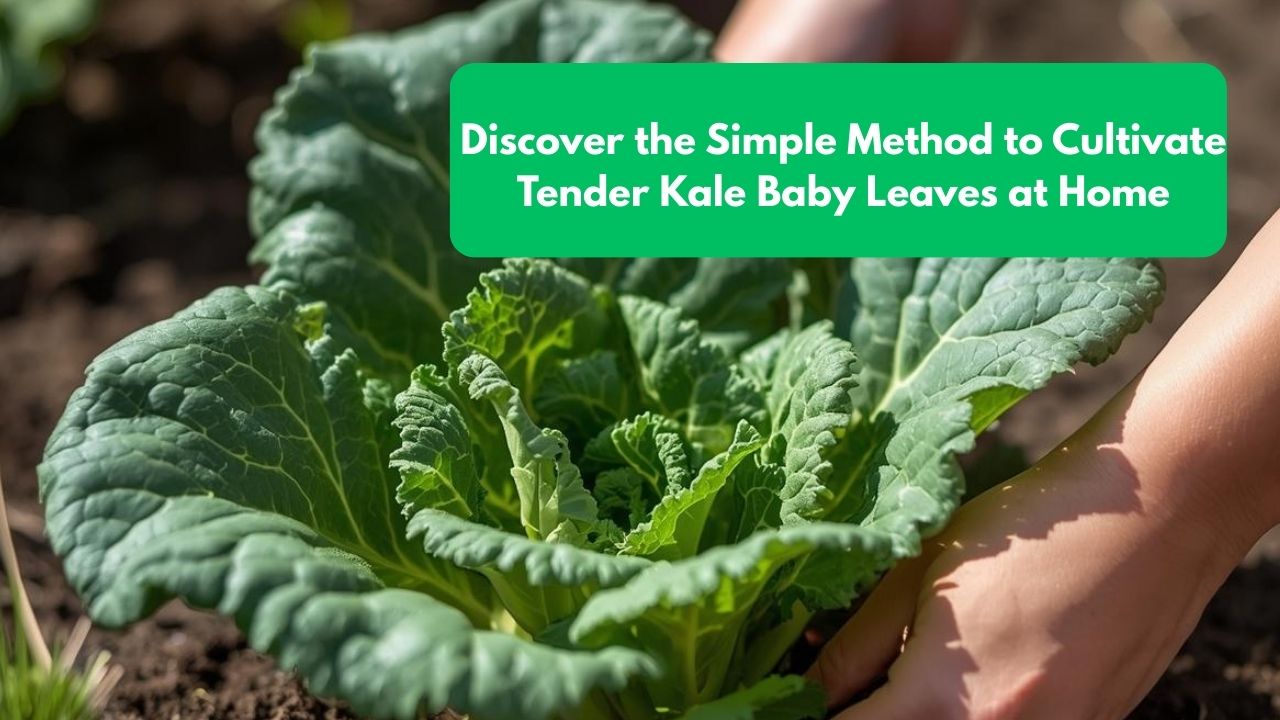
There is a quiet satisfaction in harvesting soft, tender kale baby leaves straight from your own home garden. Unlike mature kale, which can be thick and slightly bitter, baby kale leaves are delicate, mild in flavor, and perfect for salads, smoothies, and light cooking. For many home gardeners, growing baby kale is also a confidence booster because it is fast, forgiving, and productive even in small spaces.
You do not need a large garden or advanced skills to grow kale baby leaves successfully. With basic containers, good light, and consistent care, you can harvest fresh leaves within a few weeks. This guide explains the simplest and most reliable way to cultivate tender kale baby leaves at home, whether indoors or outdoors, and enjoy a continuous supply.
Understanding Baby Kale and How It Differs From Mature Kale
Baby kale refers to young kale leaves harvested early, usually when they are 2–4 inches tall. At this stage, the leaves are softer, less fibrous, and milder in taste.

Unlike mature kale plants that require more space and time, baby kale focuses on quick leaf production rather than long-term growth. This makes it ideal for container gardening, windowsills, balconies, and small raised beds.
Because the growing cycle is short, baby kale allows frequent harvesting and replanting, making it one of the most efficient leafy greens to grow at home.
Choosing the Best Kale Varieties for Baby Leaf Harvest
Almost all kale varieties can be grown as baby leaves, but some perform better than others.
Curly kale varieties produce textured, attractive leaves that hold up well in salads. Flat-leaf types grow faster and are especially tender at the baby stage.
Look for varieties labeled suitable for baby leaf or cut-and-come-again harvesting. These types regrow quickly after cutting and provide multiple harvests from the same planting.
Selecting Containers for Growing Baby Kale
Container choice plays a key role in healthy growth.
Baby kale does not require deep soil. Containers that are 6–8 inches deep are sufficient. Wider containers allow you to grow more plants closely together, increasing overall yield.
Ensure the container has drainage holes. Good drainage prevents soggy soil, which can slow growth and cause disease even in hardy plants like kale.
Shallow trays, window boxes, and standard pots all work well for baby kale cultivation.

Preparing the Right Soil Mix
Kale baby leaves thrive in loose, nutrient-rich soil.
A simple mix of potting soil and compost works well. Compost provides the nutrients needed for fast leaf growth, while potting soil ensures good drainage.
Avoid compacted or heavy soil, which restricts root development and leads to slower, uneven growth.

Before planting, lightly moisten the soil so seeds settle evenly.
Sowing Kale Seeds for Baby Leaf Production
Baby kale is grown by direct sowing rather than transplanting.
Scatter seeds evenly across the soil surface. Baby kale is grown more densely than mature kale, but seeds should not be piled on top of each other.
Cover seeds lightly with a thin layer of soil and water gently. Do not bury seeds too deeply, as this can delay or prevent germination.
Germination and Early Seedling Care
Kale seeds usually germinate within 5–7 days under normal conditions.
Place containers in a bright location with indirect sunlight. Direct harsh sunlight is not necessary during the early stages.
Keep the soil consistently moist but not wet. Uneven moisture during germination can cause patchy growth.
Providing the Right Light for Tender Leaves
Light directly affects leaf texture and flavor.
Baby kale grows best with 4–6 hours of bright light daily. A sunny window, balcony, or terrace works well. Grow lights can also be used for indoor growing.
Too little light leads to pale, leggy leaves, while excessive heat from strong sunlight can toughen young leaves.
Watering Baby Kale the Correct Way
Baby kale prefers evenly moist soil.
Water lightly whenever the top layer of soil feels dry. Avoid flooding the container, as excess moisture reduces oxygen around the roots.
Because baby kale grows quickly, consistent watering helps maintain steady growth and tender leaves.
Temperature Conditions for Best Results
Kale is a cool-season crop and grows best in mild temperatures.
Ideal temperatures range between 10°C and 20°C. Baby kale tolerates slightly warmer conditions better than mature plants but still performs best in cooler environments.
High heat can make leaves bitter and slow growth, so provide shade during hot periods if growing outdoors.
Thinning Seedlings for Uniform Growth
Once seedlings reach a few inches tall, thinning becomes important.
Crowded seedlings compete for light and nutrients, resulting in thin, weak leaves. Thin plants to leave about 1–2 inches between seedlings for baby leaf production.
Thinned seedlings can be eaten as microgreens, making thinning a useful step rather than waste.
Feeding Baby Kale for Fast Leaf Production
Because baby kale is harvested young, heavy feeding is not required.
Compost mixed into the soil usually provides enough nutrients for one or two harvests. For extended growing cycles, a diluted liquid fertilizer can be applied once every two weeks.
Avoid over-fertilizing, which can cause rapid but soft growth that spoils quickly after harvest.
Harvesting Kale Baby Leaves at the Right Time
Timing is key to achieving tender leaves.
Harvest baby kale when leaves are 2–4 inches long. Use scissors to cut leaves just above the soil line or slightly higher to allow regrowth.
Regular harvesting encourages new leaf production and extends the growing period.
Cut-and-Come-Again Method for Continuous Harvest
One of the biggest advantages of baby kale is its ability to regrow.
Instead of removing the entire plant, cut only the outer leaves and leave the center intact. This allows the plant to continue producing new leaves.
With proper care, you can harvest baby kale multiple times from the same planting.
Growing Baby Kale Indoors Year-Round
Baby kale adapts extremely well to indoor growing.
A bright window or grow light setup allows year-round production, even in colder climates. Indoor growing also reduces pest problems and weather stress.
Maintain stable temperatures and consistent light to ensure steady leaf quality.
Growing Baby Kale Outdoors in Small Spaces
Outdoor growing works well in cool seasons.
Balconies, patios, and small garden beds provide enough space for baby kale. Choose spots with morning sun and some afternoon shade.
Protect plants from extreme heat and heavy rain to preserve leaf quality.
Common Problems and Simple Solutions
Leggy growth usually indicates insufficient light. Move containers closer to a light source.
Yellowing leaves may result from overwatering or poor drainage. Allow soil to dry slightly and improve airflow.
Slow growth often occurs in very cold or very hot conditions. Adjust placement as needed.
Managing Pests Naturally
Baby kale grown indoors faces few pest issues.
Outdoor plants may occasionally attract aphids or caterpillars. Inspect leaves regularly and remove pests by hand or rinse with water.
Because leaves are harvested young, avoid chemical treatments.
Real Experiences From Home Growers
A home gardener growing baby kale on a kitchen windowsill shared that weekly sowing ensured constant supply. “I never run out because something is always ready to harvest,” they said.
Another grower noted that harvesting early made a big difference in taste. Waiting too long resulted in tougher leaves.
Observations From Small-Space Gardeners
Many small-space gardeners highlight baby kale as one of the most productive crops per square foot.
They appreciate its short growing cycle and minimal care requirements.
Gardeners also note that baby kale builds confidence, especially for beginners.
Using Baby Kale in Everyday Cooking
Baby kale leaves are versatile and easy to use.
They can be eaten raw in salads, blended into smoothies, lightly sautéed, or added to soups. Their mild flavor makes them suitable for a wide range of dishes.
Harvesting just before use ensures the freshest taste and highest nutritional value.
Staggered Planting for Non-Stop Harvests
To maintain a continuous supply, sow seeds every 1–2 weeks.
Staggered planting ensures that new leaves are always growing while older ones are being harvested.
This method works especially well in containers and indoor setups.
Refreshing Soil Between Plantings
After several harvests, soil nutrients become depleted.
Remove old roots, loosen the soil, and mix in fresh compost before replanting. This keeps the soil productive and prevents disease buildup.
Healthy soil leads to faster growth and better leaf quality.
Long-Term Benefits of Growing Baby Kale at Home
Growing baby kale at home reduces grocery costs and ensures access to fresh greens.
It encourages healthier eating habits and makes salads and meals more appealing.
Because of its simplicity and reliability, baby kale often becomes a staple crop for home gardeners.
What You Should Know Before Growing Baby Kale
Baby kale is fast, forgiving, and ideal for small spaces.
It requires good light, consistent moisture, and timely harvesting.
With minimal effort, it delivers quick results and continuous harvests throughout the year.
Questions and Answers About Growing Kale Baby Leaves at Home
Is baby kale easy to grow at home?
Yes, it is one of the easiest leafy greens.
How long does baby kale take to grow?
Usually 3–4 weeks from sowing.
Can baby kale be grown indoors?
Yes, it grows very well indoors.
How deep should the container be?
About 6–8 inches is enough.
Does baby kale need full sun?
Bright indirect light or partial sun works well.
How often should baby kale be watered?
When the topsoil feels dry.
Can I harvest baby kale more than once?
Yes, using the cut-and-come-again method.
Why are my leaves bitter?
Heat stress or late harvesting is often the cause.
Do I need fertilizer?
Light feeding is enough for baby leaves.
Can baby kale grow year-round?
Yes, especially indoors.
What temperature is best for baby kale?
Cool to mild temperatures.
Can I grow baby kale with other greens?
Yes, it pairs well with lettuce and spinach.
Is baby kale suitable for beginners?
Yes, it is highly beginner-friendly.
How long can I keep harvesting from one planting?
Usually several weeks with proper care.


Leave a Comment